Showing posts with label Tutorial. Show all posts

A Complete Sharing Widget With jQuery Effect

How To Add Attractive Sharing Widget To Blogger:-

Before proceeding to the tutorial, you should add the basic widget code to your blog from this tutorial.

How To Add Special Effect To Sharing Widget:-


If you want to add animated effect in your share widget then following change should be done in your blog template. Find the following code in blogger template.
</head>
Paste the following code just above it to make your sharing widget animated.
<script src="http://ajax.googleapis.com/ajax/libs/jquery/1.6.2/jquery.min.js" type="text/javascript"></script>
<!-- internetricks4u.blogspot.in-->
<script type="text/javascript">
$(document).ready(function(){

$("#myshare tr td").hover(function(){

$(this).find("img").animate({left:10},50);

$(this).find("img").animate({left:-10},50);

$(this).find("img").animate({left:0},50);

});

});
</script>
<!-- internetricks4u.blogspot.in-->
To add opacity effect to sharing widget then add following code just above the </head>.
<script src="http://ajax.googleapis.com/ajax/libs/jquery/1.6.2/jquery.min.js" type="text/javascript"></script>
<!-- internetricks4u.blogspot.in-->
<script type="text/javascript">
$(document).ready(function() {
$('#myshare tr td img').each(function() {
$(this).hover(function() {
$(this).stop().animate({ opacity: 0.3 }, 350);
},
function() {
$(this).stop().animate({ opacity: 1.0 }, 350);
});
});
});

</script>
<!-- internetricks4u.blogspot.in-->

Change Opacity Of An Element Using jQuery

jquery effect opacity change
jQuery is a great library of JavaScript function. You can easily create special effects in page with the help of jQuery. Most common jQuery effects are drop down menus, drag and drop elements and animations. Professional Web Designers effectively uses jQuery to change the opacity of various HTML elements like image tag <img> and ordered list or unordered list <ol> or <li> etc. All standard browsers supports jQuery which makes it more important for web developers. In Blogger, you can increase the appearance of your article and make your Blog template to look more professional with the help of jQuery by adding special effect in the post. So lets see how it works ?

Change Opacity Of An Element Using jQuery:-

The complete jQuery code given below is an example to change the opacity of an image from any desired value to any desired value with animation, which will execute on mouse hovering.

Change Opacity Of An Image Using jQuery:-

/* Code Written on http://internetricks4u.blogspot.com/ */

<script src="http://ajax.googleapis.com/ajax/libs/jquery/1.6.2/jquery.min.js" type="text/javascript"></script>

<script type="text/javascript">
$(document).ready(function() {
$('img').each(function() {
$(this).hover(function() {
$(this).stop().animate({ opacity: 0.3 }, 500);
},
function() {
$(this).stop().animate({ opacity: 1.0 }, 500);
});
});
});
</script>
/* Code Written on http://internetricks4u.blogspot.com/ */

Explanation:-

This simple jQuery script changes opacity of images from 0.3 (Mouse hover state) to 1.0 ( Normal state) with animation. Corresponding HTML code is given below.
<div>     
<img src="URL Of Image 1" />
<img src="URL of Image 2" />
</div>

Suppose if you want to focus a particular image that comes under specific CSS id or class then the corresponding jQuery and HTML code is as follows

HTML Code

<div>

<div id="testingcss">

<img src="Image url"/>

<div id="workingcss">
<img src="Image Url 1"/>
<img src="Image Url 2"/>
</div>

</div>

</div>

jQuery Code

For hovering a image that comes under the CSS id workingcss, without affecting the image that comes under testingcss id, the following changes should be done in above jQuery code.
.
/* Code Written on http://internetricks4u.blogspot.com/ */

<script src="http://ajax.googleapis.com/ajax/libs/jquery/1.6.2/jquery.min.js" type="text/javascript"></script>

<script type="text/javascript">
$(document).ready(function() {
$("#workingcss img").hover function(){
$(this).hover(function() {
$(this).stop().animate({ opacity: 0.3 }, 500);
},
function() {
$(this).stop().animate({ opacity: 1.0 }, 500);
});
});
});
</script>
/* Code Written on http://internetricks4u.blogspot.com/ */

Only the code in pink color should be change in order to focus particular image.

All In One Subscription Widget For Blogger Blog


Add Subscription Widget To Blog

How To Add All In One Subscription Widget To Blogger Blog:-

  1. In Blogger Dashboard, Go to Design / Page Element.
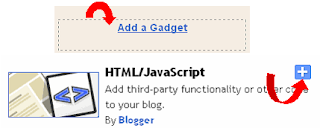
  2. Choose "Add a gadget" and then select "HTML / JavaScript".
  3. Paste the following code inside it.
blogger design pageelement
    /* Code on http://internetricks4u.blogspot.com  */
    <style type="text/css">
    #abtbox
    {width:320px;
    height:100%;
    }
    #smallabtbox
    {width:320;
    height:74px;
    border-bottom:1px solid #EEE;
    margin:5px 5px 0px 5px;
    margin-left:auto;
    margin-right:auto;
    }
    #smallabtbox1
    {width:320;
    height:74px;
    /* border:1px solid black;*/
    margin:0px 5px 5px 5px;

    }
    #smallabtbox1 span
    {color: #F55;
    font-size:15px;
    margin-bottom:30px;
    padding:7px;
    font-weight:800;
    font-family:"Palatino Linotype", "Book Antiqua", Palatino, serif;
    }
    #abtbox #smallabtbox input.mailverify
    {background:#fff !important;float:left;border:1px solid #d2d2d2;padding:0px 8px 0px 8px;color:#a19999;font-size:12px;height:25px;width:185px;/*border-radius*/-webkit-border-radius:5px;-moz-border-radius:5px;border-radius:5px;}

    #abtbox #smallabtbox input.joinemailupdates
    { border:1px solid #7575FF;
    border-radius:5px;
    -moz-border-radius:5px;
    background-color:#7575FF;
    color:#FFFFFF;
    font-weight:900;
    margin-left:10px;
    height:26px
    }
    </style>


    <div id="abtbox">
    <span style="margin-left:20px;color:#F90; font-weight:900;font-size:17px;margin-left:25px;position:relative;top:15px;"> Get Free Tricks Daily </span>

    <div id="smallabtbox">
    <div style=" position:relative; top:30px; left:25px;">
    <form action="http://feedburner.google.com/fb/a/mailverify" method="post" onsubmit="window.open('http://feedburner.google.com/fb/a/mailverify?uri=allbloggingtricks', 'popupwindow', 'scrollbars=yes,width=550,height=520');return true" target="popupwindow">
    <input class="mailverify" gtbfieldid="10" name="email" onblur="if (this.value == '') {this.value = 'enter your email here...';}" onfocus="if (this.value == 'enter your email here...') {this.value = '';}" type="text" placeholder="Enter your email here..." />

    <input name="uri" type="hidden" value="AllBloggingTricks" />

    <input class="joinemailupdates" type="submit" value="Submit" /></form>

    </div>

    </div>
    <div id="smallabtbox1"><span><center>
    Follow us on-</center></span>
    <div >
    <a href="http://twitter.com/allbloggingtric"> <img src="https://blogger.googleusercontent.com/img/b/R29vZ2xl/AVvXsEhDJ9aIFA1lsMwt8dEg06ocFWEcwq8v2186Drbvms8T-ZXKRNs_KlJtGitwC8MnWbOXc6kZZWRBkWW9vyoaqHAQkLtNv2-uNVHiGCRpQpDRCxr6Qg14ph7EQ9PEeR_F5HN7dzGnpQnoHPs/s1600/1.PNG" height="20" width="80" style="margin:0px 0px 0px 10px;"/></a>
    <a href="http://facebook.com/bloggingtrick"> <img src="https://blogger.googleusercontent.com/img/b/R29vZ2xl/AVvXsEgD_gFUkeAotqdExIT9JvTJKoB8rEodQwHRUAFezkl8EyHcRdimYG8wVGQp-NJdXuyUDX3onK8jf0YfWgg8bmDDn1BAw5vUFh21fkI2RzLwRftSQq-bJOGhHQKM0epgS01Pi3V5AhqIcoc/s1600/facebook_logo.PNG" height="20" width="80" style="margin-left:14px;"/> </a>
    <a href="https://plus.google.com/117305698834844817404"> <img src="https://blogger.googleusercontent.com/img/b/R29vZ2xl/AVvXsEgmchDovsP7HybvR7VbszDxmRnxIB8QuQJf2R2H_aVTJqN2ZukPAxHw4_1B3Mpnj7ZNMHkNQ3B1ZJtDy-kTYh9A74S3pgoSNLbyckEFsneQ0fndK34Y0Gn1vn1pYFHpL4SxDClqEnrvLo4/s1600/google_plus_logo.PNG" height="22" width="90" style="position:relative; top:5px; margin-left:20px; "/></a>

    </div>

    </div>
    </div>

    Note:-Make Following Changes

    • Replace allbloggingtric with your twitter page.
    • Replace bloggingtricks with Facebook fan page URL.
    • Replace 117305698834844817404 with your Google Plus profile.
    • Replace allbloggingtricks with your feedburner usename.
    • Further Note that this widget will work best if your widgets of sidebar are designed to have 320px width.
    I give my best in producing this widget or in writing this tutorial. Instead if anyone find difficulty in any part of this tutorial then they can contact me directly by drooping comment below.

      Customise Blogger Lists With CSS

      list ordered unordered

      How To Modify List in Blogger-

      Types Of Lists In Blogger-


      I think everybody knows what is list ? Lists are generally of type one is ordered list and another is unordered list. Blogger post editor have both of them.

      blogger post editor
      The default appearance of both the lists is not according to the taste of readers as shown in figure.
      ordered list unordered list


      1. Login to Blogger Dashboard.
      2. Go to Design / Edit HTML.
      3. Click "Expand Widget Templates".
      4. Download the full template before making any changes in it (Learn More).

      How To Modify Unordered List In Blogger:

      1. Find following piece of code in blogger template.
      ]]></b:skin>
      1. To modify the circle of unordered list, which is at starting point, paste any one of the following code just above the ]]></b:skin>.
      /* Code On http://internetricks4u.blogspot.com/

      /* To change circle with rectangle */
      .post ul li
      {
      list-style-type:square;
      }

      /* Code On http://internetricks4u.blogspot.com/

      /* To change circle with with hollow circle */
      .post ul li
      {
      list-style-type:circle;
      }
      1. To change the bullet of unordered list with the image just paste the following code above ]]></b:skin>.
        /*Code On http://internetricks4u.blogspot.com/ */

        .post ul
        {
        list-style-type:none;

        }

        .post ul li
        {
        background-image:url('Image Url');
        background-repeat:no-repeat;
        background-position:0px 7px;
        padding-left:25px;
        }

        Note:- Make Following Modification

        • Replace Image Url with the URL of the image.
        • If image and text of list not coincide on a horizontal line then adjust the value of 7px.
        • The dimension of image used should not be greater than 16 * 16.

          How To Modify Ordered List

          Ordered list are much easier to customise in relative to unordered list. In ordered list, you can only customise the arranging order of list which is pretty easier.

          ordered list change
          Have you seen the result ? We can start ordered list with large number of arranging pattern.The corresponding CSS code is given below.
          /*Code On http://internetricks4u.blogspot.com/ */
          .post ol
          {

          list-style-type:upper-roman|upper-latin|lower-roman|lower-latin|lower-greek|lower-alpha;

          }

          For Example: If you are interested to use upper roman then the corresponding code will be.

          /*Code On http://internetricks4u.blogspot.com/ */
          .post ol
          {

          list-style-type:upper-roman;

          }

          25+ Back to top buttons images plus 1 more

          back to top images collectionAfter we have posted the last post about how to add back to top button in blogger I have decided to make a big collection for back to top images and this collection consists of more than 25 back to top images so you can choose the image that you want to put in the previous post code, the images will be uploaded directly so you can copy links directly so it can be more easier so I hope you like it and share it with your friends, this collection will be unique and I am the one who collected it and all copyrights of this images is to its owner I only collected it and posted it to our great readers.

          How to use this images

          The images in this great collection will be uploaded directly so you right click on the one you want and choose copy image link or any statement with same meaning as its different from browser to another, then you add the link to the image link as stated in the previous post and then you are done.

          Back to top Images collection

          Lets start with the collection of the images:


          Last Words:

          I hope you liked this collection if you will use any image then share this post with your friends, All copyrights for this images are for its own designer I only have collected it.
          Peace : )


          Posted: 04 Apr 2012 01:40 PM PDT
          scrolling to top button for blogger
          Another great amazing widget that is really helpful for any blogger this amazing widget will make the user can scroll to the top of the page with one click and as we are trying to provide easy navigation to our readers then we are introducing to all bloggers this amazing widget which is really great, the thing that is different about this scrolling to top button is that it appears when the user goes down and disappears when he return back to top. You must see it now and put it in your blog its easy to put it and its only one step so lets see it now.

          How to Add this "scrolling to top" button in blogger?

          1. Go to blogger
          2. Click on layout
          3. Choose add a gadget at any place, you can choose the one which is at the bottom
          4. Click on html/javascript
          5. Add the following code in the window that opens
          <script type="text/javascript" src="http://ajax.googleapis.com/ajax/libs/jquery/1.3.2/jquery.min.js"></script>
          <script type="text/javascript" >
          /***********************************************
          * Scroll To Top Control script- © Dynamic Drive DHTML code library (www.dynamicdrive.com)
          * Modified by www.MyBloggerTricks.com, www.ToStartBlogging.com
          * This notice MUST stay intact for legal use
          * Visit Project Page at http://www.dynamicdrive.com for full source code
          ***********************************************/

          var scrolltotop={
              //startline: Integer. Number of pixels from top of doc scrollbar is scrolled before showing control
              //scrollto: Keyword (Integer, or "Scroll_to_Element_ID"). How far to scroll document up when control is clicked on (0=top).
              setting: {startline:100, scrollto: 0, scrollduration:1000, fadeduration:[500, 100]},
              controlHTML: '<img src="IMAGE LINK" />', //HTML for control, which is auto wrapped in DIV w/ ID="topcontrol"
              controlattrs: {offsetx:5, offsety:5}, //offset of control relative to right/ bottom of window corner
              anchorkeyword: '#top', //Enter href value of HTML anchors on the page that should also act as "Scroll Up" links

              state: {isvisible:false, shouldvisible:false},
              scrollup:function(){
                  if (!this.cssfixedsupport) //if control is positioned using JavaScript
                      this.$control.css({opacity:0}) //hide control immediately after clicking it
                  var dest=isNaN(this.setting.scrollto)? this.setting.scrollto : parseInt(this.setting.scrollto)
                  if (typeof dest=="string" && jQuery('#'+dest).length==1) //check element set by string exists
                      dest=jQuery('#'+dest).offset().top
                  else
                      dest=0
                  this.$body.animate({scrollTop: dest}, this.setting.scrollduration);
              },

              keepfixed:function(){
                  var $window=jQuery(window)
                  var controlx=$window.scrollLeft() + $window.width() - this.$control.width() - this.controlattrs.offsetx
                  var controly=$window.scrollTop() + $window.height() - this.$control.height() - this.controlattrs.offsety
                  this.$control.css({left:controlx+'px', top:controly+'px'})
              },

              togglecontrol:function(){
                  var scrolltop=jQuery(window).scrollTop()
                  if (!this.cssfixedsupport)
                      this.keepfixed()
                  this.state.shouldvisible=(scrolltop>=this.setting.startline)? true : false
                  if (this.state.shouldvisible && !this.state.isvisible){
                      this.$control.stop().animate({opacity:1}, this.setting.fadeduration[0])
                      this.state.isvisible=true
                  }
                  else if (this.state.shouldvisible==false && this.state.isvisible){
                      this.$control.stop().animate({opacity:0}, this.setting.fadeduration[1])
                      this.state.isvisible=false
                  }
              },
              init:function(){
                  jQuery(document).ready(function($){
                      var mainobj=scrolltotop
                      var iebrws=document.all
                      mainobj.cssfixedsupport=!iebrws || iebrws && document.compatMode=="CSS1Compat" && window.XMLHttpRequest //not IE or IE7+ browsers in standards mode
                      mainobj.$body=(window.opera)? (document.compatMode=="CSS1Compat"? $('html') : $('body')) : $('html,body')
                      mainobj.$control=$('<div id="topcontrol">'+mainobj.controlHTML+'</div>')
                          .css({position:mainobj.cssfixedsupport? 'fixed' : 'absolute', bottom:mainobj.controlattrs.offsety, right:mainobj.controlattrs.offsetx, opacity:0, cursor:'pointer'})
                          .attr({title:'Scroll Back to Top'})
                          .click(function(){mainobj.scrollup(); return false})
                          .appendTo('body')
                      if (document.all && !window.XMLHttpRequest && mainobj.$control.text()!='') //loose check for IE6 and below, plus whether control contains any text
                          mainobj.$control.css({width:mainobj.$control.width()}) //IE6- seems to require an explicit width on a DIV containing text
                      mainobj.togglecontrol()
                      $('a[href="' + mainobj.anchorkeyword +'"]').click(function(){
                          mainobj.scrollup()
                          return false
                      })
                      $(window).bind('scroll resize', function(e){
                          mainobj.togglecontrol()
                      })
                  })
              }
          }

          scrolltotop.init()
          </script>
          Replace IMAGE LINK with the link of your image we will share some good amazing images in the next post so subscribe to be updated, and this is a link to one of the buttons

          Last Words:

          We hope that you liked this post subscribe to be updated with news and wait for more and more plugins that you will enjoy.
          you can also see this post

          Source: 25+ Back To Top Buttons Images

          How to show description meta tags in custom templates?

          How to show description meta tags in custom templates

          As we know in the New Blogger SEO Options That Is Really Great that was introduced by blogger that there are many new seo options that Google added to it blogging service as they are trying to be the top in there niche and from this new options was meta description that you can add to your main blog and also to every post that you write but the problem that many people use the custom templates as in our blog and they don't appear in it so here I came with a solution so that any meta description will be added directly by only adding 3 lines code so lets see how.

          how to add meta description tag to your blog

          I have added all the information about this in the previous post New Blogger SEO Options That Is Really Great and I will not add it again here so that it would not be put 2 times.

          How to show description meta tags in custom templates?

          Lets see now how to make description meta tag appears in custom templates:

          1. Go to template then click on edit html
          2. After <head> add this simple code


          <b:if cond='data:blog.metaDescription != &quot;&quot;'>
            <meta expr:content='data:blog.metaDescription' name='description'/>
          </b:if>
          You may now delete any meta description you have added before, if you have added the code as in the on page optimization post series then remove the code that is related to description which will be like the following code:


          <b:if cond='data:blog.url == data:blog.homepageUrl'>
          <meta content='YOUR BLOG DESCRIPTION' name='description'/> </b:if>

          Last Words:

          I hope you liked this post and your description is now appearing in search engines. Try from now to write meta description to your new posts and old if you can as a well good description can make your blog ranks higher and higher in search engines, so write one or at most 2 lines that can attract search engines robots as well as your readers. Peace and blessings everyone.

          How to create a favicon for your blog or website

          Favicon is the unique icon you see when visiting a site  to the left corner of the address bar for most browser. It works somewhat like a badge or icon for your site or blog. Either you have  blog or website it is very easy to set up a favicon for your site. Follow the instructions below to know how.
          how to make favicon for your blog or website

          For blogger users:
          Blogger has a very simple way to get favicon, all you need it a square image.
          Go to Layout>Favicon and upload your picture and save
          If you don't know how to get your picture square, follow the steps below

          For any other users

          • Click on the link below to go to the tool
          Favicon maker- Create a favicon from any image
          • Upload your picture there, and click create icon
          • Then click download the icon and upload it to wherever you want.
          • Right click on the image and click view image
          • Copy the URL
          • Now replace favicon.ico to the link you just copied and use it on the code below
          <link rel="shortcut icon" type="image/x-icon" href="/favicon.ico">
            
          • Insert the code into your section of your website
          All done! The favicon might not appear imminently. It can take up to three days.

          Free 3d eBook cover page creator

          Creating a 3d eBook coverage is a important step to attract your readers online. Giving it a 3d look seems to be the best. But this method comes with either waste of money and time. This post will show you a simple solution for your e-book if you wish to use small scale images. But still it's so far one of the best free 3d eBook cover creator or generator online. One of the best feature of this is that you can choose the position by rotating the book and it also creates a nice shadow effect. Check out the video for instructions and link is below.
          free 3d ebook coverpage creator generator maker free online ebook coverpage in 3d

          Link : http://3d-pack.com
          Video:

          Mashable sharing widget now on blogger

          mashable sharing widgetThis amazing wordpress sharing widget is now on blogger yes now you can add this amazing sharing widget to your blogger blog this widget is the one that is on mashable.com the famous blog that ranks in alexa 138 and a lot of people like it so I hope you liked this widget. Its really great it has all the important social media sites as Facebook, twitter etc. I hope you like it.

          How To add this sharing widget?

          1. Go to blogger
          2. Click on layout in the new blogger  or click on design
          3. Click on add a gadget
          4. Choose html/javascript
          5. Copy the following code by selecting it and click on ctrl+c then click on ctrl+p in the html/JavaScript window that you opened
          <style>
          /* Social Widget */
          #TSB-mashable-bar {
              border: 0;
              margin-bottom: 10px;
              margin: 0 auto;
                  width:300px;
          }
          .fb-likebox {
              background: #fff;
              padding: 10px 10px 0 10px;
              border: 1px solid #D8E6EB;
              margin-top: -2px;
                  height:80px;
          }
          .googleplus {
              background: #F5FCFE;
              border-top: 1px solid #FFF;
              border-bottom: 1px solid #ebebeb;
              border-right: 1px solid #D8E6EB;
              border-left: 1px solid #D8E6EB;
              border-image: initial;
              font-size: .90em;
              font-family: "Arial","Helvetica",sans-serif;
              color: #000;
              padding: 9px 11px;
              line-height: 1px;}
          .googleplus span {
              color: #000;
              font-size: 11px;
              position: absolute;
              display:inline-block;
              margin: 9px 70px;}
          .g-plusone {    float: left;}
          .twitter {
              background: #EEF9FD;
              padding: 10px;
              border: 1px solid #C7DBE2;
              border-top: 0;}
          #mashable {
              background: #EBEBEB;
              border: 1px solid #CCC;
              border-top: 1px solid white;
              padding: 2px 8px 2px 3px;
              text-align: right;
              border-image: initial;}
          #mashable .author-credit {}
          #mashable .author-credit a {
              font-size: 10px;
              font-weight: bold;
              text-shadow: 1px 1px white;
              color: #1E598E;
              text-decoration:none;}
          #email-news-subscribe .email-box{
              padding: 5px 10px;
              font-family: "Arial","Helvetica",sans-serif;
              border-top: 0;
              border-right: 1px solid #C7DBE2;
              border-left: 1px solid #C7DBE2;
              border-image: initial;
             height:35px;}
          #email-news-subscribe .email-box input.email{
              background:#FFFFFF;
              border: 1px solid #dedede;
              color: #999;
              padding: 7px 10px 8px 10px;
              -moz-border-radius: 3px;
              -webkit-border-radius: 3px;
              -o-border-radius: 3px;
              -ms-border-radius: 3px;
              -khtml-border-radius: 3px;
              border-radius: 3px;
              border-image: initial;
              font-family: "Arial","Helvetica",sans-serif;}   
          #email-news-subscribe .email-box input.email:focus{color:#333}   
          #email-news-subscribe .email-box input.subscribe{
              background: -moz-linear-gradient(center top,#FFCA00 0,#FF9B00 100%);
              background: -webkit-gradient(linear,left top,left bottom,color-stop(0,#FFCA00),color-stop(1,#FF9B00));
              background: -moz-linear-gradient(center top,#FFCA00 0,#FF9B00 100%);
              -pie-background: linear-gradient(270deg,#ffca00,#ff9b00);
              font-family: "Arial","Helvetica",sans-serif;
              border-radius:3px;
              -moz-border-radius:3px;
              -webkit-border-radius:3px;
              border:1px solid #cc7c00;
              color:white;
              text-shadow:#d08d00 1px 1px 0;
              padding:7px 14px;
              margin-left:3px;
              font-weight:bold;
              font-size:12px;
              cursor:pointer;
              border-image: initial;}
          #email-news-subscribe .email-box input.subscribe:hover{
              background: #ff9b00;
              background-image:-moz-linear-gradient(top,#ffda4d,#ff9b00);
              background-image:-webkit-gradient(linear,left top,left bottom,from(#ffda4d),to(#ff9b00));
              filter:progid:DXImageTransform.Microsoft.Gradient(startColorStr=#ffffff,endColorStr=#ebebeb);
              outline:0;-moz-box-shadow:0 0 3px #999;
              -webkit-box-shadow:0 0 3px #999;
              box-shadow:0 0 3px #999
              background:-webkit-gradient(linear,left top,left bottom,color-stop(0,#ffda4d),color-stop(1,#ff9b00));
              background:-moz-linear-gradient(center top,#ffda4d 0,#ff9b00 100%);
              -pie-background:linear-gradient(270deg,#ffda4d,#ff9b00);
              border-radius:3px;
              -moz-border-radius:3px;
              -webkit-border-radius:3px;
              border:1px solid #cc7c00;
              color:#FFFFFF;
              text-shadow:#d08d00 1px 1px 0}   


          </style>

          <!--[if IE]>
          <style>
          #email-news-subscribe .email-box input.subscribe{
              background: #FFCA00;
              }
          </style>
          <![endif]-->
           
          <!--begin of social widget--> <div style="margin-bottom:10px;"> <div id="TSB-mashable-bar" > <!-- Begin Widget --> <div class="fb-likebox"> <!-- Facebook --> <iframe src="//www.facebook.com/plugins/like.php?href=http://facebook.com/pages/To-Start-Blogging-Learn-Blogging-From-Beginning-To-Pro/272081179526355&amp;send=false&amp;layout=standard&amp; width=200px&amp;show_faces=true&amp;action=like&amp;colorscheme=light&amp;
          font&amp;height=100px&amp;appId=234513819928295" scrolling="no" frameborder="0" style="border:none; overflow:hidden; "></iframe> </div> <div class="googleplus"> <!-- Google --> <span>Recommend us on Google!</span><div class="g-plusone" data-size="medium"></div> <script type="text/javascript" src="https://apis.google.com/js/plusone.js"></script> </div> <div class="twitter"> <!-- Twitter --> <iframe title="" style="width: 300px; height: 20px;" class="twitter-follow-button" src="http://platform.twitter.com/widgets/follow_button.html#_=1319978796351&amp;
          align=&amp;button=blue&amp;id=twitter_tweet_button_0&amp;
          lang=en&amp;link_color=&amp;screen_name=tostartblogging&amp;show_count=&amp;
          show_screen_name=&amp;text_color=" frameborder="0" scrolling="no"></iframe> </div> <div id="email-news-subscribe"> <!-- Email Subscribe --> <div class="email-box">
          <form action="http://feedburner.google.com/fb/a/mailverify" method="post" target="popupwindow" onsubmit="window.open('http://feedburner.google.com/fb/a/mailverify?uri=tostartblogging', 'popupwindow', 'scrollbars=yes,width=550,height=520');return true">   
                  <input class="email" type="text" style="width: 150px; font-size: 12px;" id="email" name="email" value="Enter Your Email here.." onfocus="if(this.value==this.defaultValue)this.value=&#39;&#39;;" onblur="if(this.value==&#39;&#39;)this.value=this.defaultValue;" />       
                  <input type="hidden" value="tostartblogging" name="uri" />
                  <input type="hidden" name="loc" value="en_US" />
                  <input class="subscribe" name="commit" type="submit" value="Subscribe" />   
              </form>
          </div> </div>  <div id="mashable" style="background: #EBEBEB;border: 1px solid #CCC;border-top: 1px solid white;padding: 1px 8px 1px 3px;text-align: right;border-image: initial;font-size:10px;font-family: "arial","helvetica",sans-serif;"> <span class="author-credit" style="font-family: Arial, Helvetica, sans-serif;"><a href="http://www.ToStartBlogging.com" target="_blank" >To Start Blogging </a>»</span></div></div>
          <!-- End Widget -->  <!--end of social widget--></div>

          Customization:

          Now make this changes to the texts highlighted with the yellow color:
          • Change width:300px; with the width of your sidebar
          • Change http://facebook.com/pages/To-Start-Blogging-Learn-Blogging-From-Beginning-To-Pro/272081179526355 with your facebook fan page url
          • Change the 1st tostartblogging with your twitter username
          • Change the 2nd and 3rd one with your feedburner link
          Now You Are Done save and view your blog.

          Last Words:

          This Widget is mainly designed by mbt and we have stylized it some so if you want to share it with your readers you must link to our blog or to this post. I hope you liked this post and this widget wait for more and more better one so you can subscribe to receive updates.
          Peace : )


          Source: Mashable

          Why Description Meta Tags Not Showing In Custom Templates?

          Search Description blogger

          Meta Tags for Homepage, posts and pages wont display in custom templates if you view the browser source file for your blog.  This is because custom templates are coded by third party designers and therefore we would manually need to insert the necessary code to make this feature of latest search preferences work in your customized blogs. The method is really easy. We would delete any existing Meta Tag for description inside your templates and would replace it with a dynamic code that will act as a meta tag both for homepage and as well as for individual posts and pages.

          Read more »

          Add a facebook login button to your blogger using html code

          UPDATE This is an updated tutorial on how to add a FaceBook Login button to your Google Blog/blogger/blogspot. Since my last post there are a few things that can be done so that the login button shows either when you are going directly to your personal blog or viewing a post. The earlier bug was that the login button was not showing, this has to do with the first step for it to work correctly.

          Step One 

          • Create an FaceBook App on the Facebook Developers website.  This step is pretty much an easy walk through.  Below is an image of what you need to get your app working correctly.  Once you create your Facebook app it does take a little while for it to work on the website/blog so be patient.
          • In the image below make note that the following fields need to be completed.  This set-up is a basic format.  Once you create the Facebook app, this will help to promote your website as well.


          Click to Enlarge

          Read more »

          Blogger new easy Nofollow

          Under all this new blogger updates, one of the cool update I think is easier system of nofollow link. You can learn more about nofollow links from one of my previous post and a post about how to find nofollow links to use it for your benefit. If you are trying to get better page rank, making links nofollow helps to prevent linking to too many or resticted sites from your blog. You don't have to mess with HTML anymore in ordered to make a nofollow link. All you have to do is to lick Link option on the top in your composer and check Add 'rel=nofollow' attribute option to make the link no follow as it is shown in the picture.

          How To Find and Redirect Broken Links In Blogger?

          redirect broken links in bloggerI personally really liked the Page Redirect option among thelatest search preferences by blogger. It lets you easily redirect or cloak  deleted, missing, non-existing or removed posts in your BlogSpot blogs to an existing location. Normally for pages that are not found, blogger automatically displays the 404 Error page but this can harm your PageRank from internal and external links. Suppose you had a post and people started giving it backlinks and it got circulated everywhere, if for some reasons you decided to delete that post, people and robots will see a URL error i.e Page Not Founderror. All that PageRank juice which was pointing this specific page will be lost therefore you must learn how to redirect missing pages in blogger both for redirecting PageRank juice and also for making your blog more search engine friendly because this is the only way to reduce the number of crawl errors you see at your Google Webmaster Account. We will be dealing this tutorial in a detailed manner to make best possible use of Custom Redirection.

          What are Broken Links?

          In layman terms any page or post that you delete in your blog or website is termed as a broken link by search robots. Its called broken because the link points to a missing content and displays a 404 error page.

          How To Find Broken Links?

          Sometimes you don't remember which posts were deleted by you or which URLs are causing crawl errors and making it difficult for search spiders to index your blog more smoothly. To find broken links in your blog no matter you are running a Google blog or Wordpress or any website, the method below applies to all:
          1. Go To Google Webmasters Account
          2. Select your blog
          3. Click the link under crawl errors
          blogger crawl errors
               4.   Next click on Not Found
          image
          If you are running a blogger blog then you will observe several missing/broken URLs list , this is because most of your dynamic pages like comment page and search pages needs to be removed from search indexing using your webmaster account and if you see too many errorsthen do not panic, it wont effect your blog SEO too much but removing errors is always good than letting the error list grow. I will discuss the techy part of it in some other tutorial for this post we will keep our focus on deleted posts links only.
          Now carefully look at the URL errors and note down the post links that you come across. In my case I had deleted a post I once wrote on Feedburner and also one on HostGator Plansthat I deleted due to some reasons. The links would look like this in the error list:
          blogger url errors
          Since people were linking back these two posts therefore I had to redirect them to homepage so that I keep receiving the PageRank juice and keep Blog indexing by robots smooth. Anyone who would click this links would see a 404 error page instead. So what we did was redirecting both these pages to Blog homepage. The procedure is defined in next step.

          Redirect Broken Links

          It is always wise to redirect broken links to homepage or any related page. This will flow the backlinks generous juice instead to homepage  or any page that is related to that deleted post. Lets see how we redirected the two links above.
           Redirect to a Related Post:   Redirecting the Hostgator Link
          Clicking the hostgator link which is at Priority#5 as shown in the screenshot above opens a new window from where you can copy its full URL
          page not found
          This is the link:
          http://www.mybloggertricks.com/2012/02/hostgator-best-hosting-plans-for.html
          The part of link we are interested is the highlighted ending portion.
          Now lets learn how to redirect the above broken link to an existing post (related link) which also speaks about HostGator hosting plans and the link for it is:
          http://www.mybloggertricks.com/2012/01/hostgator-best-hosting-plans-for.html
          Don't get confused that the above two links seem exactly similar except the month 01 and 02. Its just a coincidence :)
          Lets now redirect the link:
          1. Go To draft.Blogger.com or just blogger.com if you have upgraded to new interface
          2. Then go to Settings > Search preferences
          3. Click the edit link next to custom redirects
          4. Inside the FROM box I would insert the broken link
          5. and Inside the TO Box I will insert the link for an existing link to which we want to redirect the missing/broken link
          redirect broken links blogger
               6.   Click the Save link followed by the Save Changes button
               7.   The link in now successfully redirected to an existing post.
          If you click the broken link below, it will take you straight to the new related post.
          Redirect To HomePage:  Redirect the Feedburner link
          Since I had no related post for feedburner so I redirected it to my homepage and this is what I recommend to you all. Redirect to related posts only if you have any else simply redirect all broken links to homepage.
          The procedure is same except for the TO box. I need to redirect the feedburner link from this:
          http://www.mybloggertricks.com/2011/06/hack-feedburner-count-postscomments-of.html
          To homepage link
          http://www.mybloggertricks.com/
          See the screen shot:
          redirect posts in blogger
          Notice that inside the FROM box I inserted the ending portion for broken link and inside the TO box I simply inserted a forward slash i.e. (/)
          Click save and all done!
          Now click the following link and you will find yourself redirected to MBT Main Homepage.

          Need Help?

          I just hope this demonstrative tutorial may prove helpful and locating and redirecting missing links in your blog. The method will redirect all links in your blog no matter how many times they are interlinked thus not saving both PageRank and traffic from external links that point to you. Without the above method you will have to manually locate and edit the links which could take months!
          It is a new addition in our services apart from 302 redirect services for blogger to wordpress migration that we already offer. I juts hope you find it easy to implement the above method correctly. I use it for the SEO of this blog and our other blogs. Please let me know if you needed any help. Wish you peace and love! :)

          Source: mybloggertricks