Showing posts with label Blogging. Show all posts
Browse » Home » Artikel Pada Kategori Blogging
Mad men in the modern tech world
The Brain of a Blogger
Blogger new easy Nofollow
Under all this new blogger updates, one of the cool update I think is easier system of nofollow link. You can learn more about nofollow links from one of my previous post and a post about how to find nofollow links to use it for your benefit. If you are trying to get better page rank, making links nofollow helps to prevent linking to too many or resticted sites from your blog. You don't have to mess with HTML anymore in ordered to make a nofollow link. All you have to do is to lick Link option on the top in your composer and check Add 'rel=nofollow' attribute option to make the link no follow as it is shown in the picture.How to find code in blogger
To customize your blog yo will need to find certain codes from your template to replace it, add new code or to verify. But be sure to back up your template first before you find and change any code. Finding any code is very easy in blogger. Just follow the simple steps below to find a code.

1 Go to blogger.com
2. Go to Template>Edit HTML
3. Press CTRL+F and type/paste the code your looking for
4. The code will be highlighted on the screen

How to find code in blogger
1 Go to blogger.com
2. Go to Template>Edit HTML
3. Press CTRL+F and type/paste the code your looking for
4. The code will be highlighted on the screen
The Link Within
Blog sites will do well to harness the advantages of internal linking as they seek to build a reliable network outside of their sites. Internal linking may provide benefits similar to those offered by external linking such as helping to improve search engine rankings for the site’s posts and pages. However, what it primarily does is to increase page views by encouraging readers to click on links within the site, thereby effectively increasing the total amount of time a reader spends on the site itself.
Internal linking suggests cohesiveness of articles and posts offered by a site. By suggesting related readings that can be found within, sites are able to present themselves as a more reliable source of comprehensive information. Many sites are already using plug-ins that create a sitemap page that provides links to posts required by readers. Links to related posts can also be conveniently placed at the end of posts.
The number of internal links can be increased by posting articles in a series. Since one post is directly related to the others in a series, internal linking makes sense. This option however should be used prudently to avoid creating the impression that articles are purposely being broken down to gain page views. Bloggers can also opt to provide periodic summaries of their posts which conveniently contains links to the most popular posts on the site. This is to allow inclusion of internal links while affording readers the chance to be made aware of missed articles.
Text links provide a chance to link to older posts. Bloggers who consistently spurn out quality content will find this internal linking option quite convenient to do. Internal linking should be done in a manner that encourages readers to spend more time on the site instead of appearing like a strategy to get more of the readers’ time.
Internal linking suggests cohesiveness of articles and posts offered by a site. By suggesting related readings that can be found within, sites are able to present themselves as a more reliable source of comprehensive information. Many sites are already using plug-ins that create a sitemap page that provides links to posts required by readers. Links to related posts can also be conveniently placed at the end of posts.
The number of internal links can be increased by posting articles in a series. Since one post is directly related to the others in a series, internal linking makes sense. This option however should be used prudently to avoid creating the impression that articles are purposely being broken down to gain page views. Bloggers can also opt to provide periodic summaries of their posts which conveniently contains links to the most popular posts on the site. This is to allow inclusion of internal links while affording readers the chance to be made aware of missed articles.
Text links provide a chance to link to older posts. Bloggers who consistently spurn out quality content will find this internal linking option quite convenient to do. Internal linking should be done in a manner that encourages readers to spend more time on the site instead of appearing like a strategy to get more of the readers’ time.
Thngs to remember when choosing a blogger templete
In the crowd of thousands of free blogger template you should always choose the "right" template for your blog. If you are a serious blogger or have a good mission for your blog you should definitely take this seriously. Even though they shouldn't, they will judge you by the looks of the blog right after the article. You can find lots of different customized paid and free blogger template over the internet. And here are some good tips you should remember when getting a template for your blog or customizing it.1. Choose your type
The first thing is to match with the work your doing. If you have a blog about dead people and mystery it will not be great choice if you use a super colorful template. Think about your blog as a reader and the environment they need for to enjoy the article you write.
2. Number of columns
This can be define as one of #1 's sub category. Where you should know about your blog. Don't get any ads ready blog if you are new blogger or don't have much experience with html. Think about what your visitor will do and how fast and easily they can do it. Think about this and get a template.
3. Know your rights
Although you can find billions of free template you should know how much free is it. Most of them allow you to use it with link back others might give it for free or not allow for certain use. To avoid future problems read and see the rights of you to use the template.
4. Color Counts
If you don't have enough knowledge about html editing you should choose your color that matches your requirement and content.
5. Size and neatness
Choose your size of the blog where the actual content will appear. Using too many types of "cool stuff" might not be goof for your visitor and the speed of your blog. If the blog is too laggy people won't be interested in going to see anything extra you offer.
6. Your reader's have diabetics
Adding plugins, wages, script are good to make your blog "cooler" but you should remember that your readers have diabetics if you give them too much sugar they will most likely die! Keep it balanced.
Remember if you are expecting visitor it's not you who will need the information, your reader will. So do whatever it takes to give them the simplest interface and user-friendly fast blog.
I wrote this post originally on my other blog pretty long ago, I think it still worth some value.
Using Free Image
There are many needs of digital images online. It is And there are billions of images out there you can just copy paste and use it to your blog. For bloggers it is very important to have a good image with each post and most of them Google search it and use it to their blog. It might be a great high quality image but most likely your now hosting a copyrighted material. If you want to hide from all the penalties you also Google search for free images which gives you few billion result of site that will provide you "free" images, which aren't actually as free as you think it is.

What Google search does is to view all the indexed images over internet and there are no way to know if it is actually copyrighted or not. If claim the copyright for a copyrighted image, either the copyrighter or your host can take down your site. If you think you are lucky, you will already be penalize on traffic by your search engine.
Royalty free is a system where there is a copyright holder and they allow you to use their images with out royalty fee. With of course limitation. It can mean you have to pay the creator one time fee, or creator will limit you to certain size, length and where and how you can use the image. So don't go crazy with royalty free stuff. There is a copyright holder who can take action against you for going over limitation.
Definitely not. Every free image distribution sites has certain limit. Some makes you link to their site (takes your juice), some wants a limited time royalty. Some are just scam and list of images from Google. Some sites says their photos are public domain (see below for more info), while they get the images from user upload where anyone can upload a copyrighted photo isn't a good place to find your photo either. Of course there are actual free images that you can use for your site out there, but since most of them are not actually what you need don't take the chance.
Yes you are allowed to use public domain image freely in your site or blog. Public domain images are images that doesn't have any copyright holders. It's in a position that it is unable to restore the copyright claim for the photo. Thus you can use the image for almost anything without royalties or permissions. But you can not claim copyright for the image. Unfortunately not every site that says to have public domain photos are public domain, so be careful using one. Public domain is the best choice if you are looking for free images.
There are lots of public domain image search out there. Here you can find a Wikipedia's big list of sites for your need.
Google is the world
What Google search does is to view all the indexed images over internet and there are no way to know if it is actually copyrighted or not. If claim the copyright for a copyrighted image, either the copyrighter or your host can take down your site. If you think you are lucky, you will already be penalize on traffic by your search engine.
How about royalty free?
Royalty free is a system where there is a copyright holder and they allow you to use their images with out royalty fee. With of course limitation. It can mean you have to pay the creator one time fee, or creator will limit you to certain size, length and where and how you can use the image. So don't go crazy with royalty free stuff. There is a copyright holder who can take action against you for going over limitation.
The free photo sites then?
Definitely not. Every free image distribution sites has certain limit. Some makes you link to their site (takes your juice), some wants a limited time royalty. Some are just scam and list of images from Google. Some sites says their photos are public domain (see below for more info), while they get the images from user upload where anyone can upload a copyrighted photo isn't a good place to find your photo either. Of course there are actual free images that you can use for your site out there, but since most of them are not actually what you need don't take the chance.
Public Domain?
Yes you are allowed to use public domain image freely in your site or blog. Public domain images are images that doesn't have any copyright holders. It's in a position that it is unable to restore the copyright claim for the photo. Thus you can use the image for almost anything without royalties or permissions. But you can not claim copyright for the image. Unfortunately not every site that says to have public domain photos are public domain, so be careful using one. Public domain is the best choice if you are looking for free images.
So where can I find public domain images?
There are lots of public domain image search out there. Here you can find a Wikipedia's big list of sites for your need.
10 Best Free Blogger Templates You Should Check
Blogger is best platform for newbies. most of them confused which one theme to choose? Now don't confuse because Today We decided to present some of best free blogger templates. All of below are free and premium looking. We had added some of demo, download button with some description too. Hope you will enjoy them
See Also:
See Also:
Grade Blogger Template
Another free 3 column magazine style blogger template with 2 sidebars, featured Section, fixed width, slider and and a handy top navigation bar.Instinct Blogger Template
Elegant magazine style blogger template with 1 Sidebar, 2 Column, 4 Column footer, featured section, header banner, slider, tabbed widget and easy top navigation menu.Dreamy
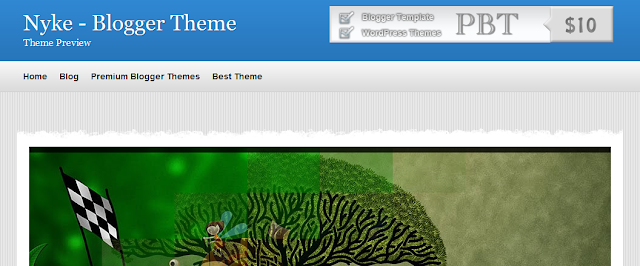
Nyke - Magazine Blogger Template
The Featured Slider, Image Slideshow has a very unique rounded bottom and a number of coll transitions between images.The template has a two column layout with right sidebar.ProPress -Premium Looking Free Blogger Template
Conventy – Free Blogger Template
Hope you will be enjoy these great collections.
Ammar is the a 16 Years old blogger. He loves to write about Tips, Tricks and Tutorials. He blogs at AllBloggingTips where he share Blogging Tips and Free Themes
Simple CSS menu with hover effect
If you don't like the classic blogger menus you can choose to use simple and cool menu with a hoover effect. The menu will show text and a link to your pages. It is very simple easy and will fit for most of the blogs. So let's get started with this.

First we have to add the CSS.
Once you have done that save your template.
Now, click on the button below and select your blog and add the code
Go to Blogger>Design>Page Element and edit "Custom Menu" and do the following changes
Optional:
Credit:
The credit for the codes goes to CSSHowto.com

First we have to add the CSS.
- Go to Blogger Dashboard>Design> Edit HTML
- Backup your template
- Press CTRL+F and find ]]></b:skin> and paste the following code above it.
ul#navlist {display: inline;list-style: none;}ul#navlist li {float: left;width: 60px;height:60px;}ul#navlist li a {width: 50px;height:50px;padding:5px;display:block;color:#fff;text-decoration: none;font-size:7pt;font-family:arial;line-height:50px;text-align:center;border-right:1px solid #fff;border-left:1px solid #fff;border-top: 5px solid #fff;border-bottom: 5px solid #fff;background: #003663;}ul#navlist li a:hover {border-top: 5px solid #004a80;border-bottom: 5px solid #004a80;background:#004a80;font-size:9pt;font-weight:bold;}
Once you have done that save your template.
Now, click on the button below and select your blog and add the code
Go to Blogger>Design>Page Element and edit "Custom Menu" and do the following changes
- Change "one" "two" "three" and so on with the text you want to show up inside the menu
- You can delete a line <li> to </li> if you don't need them all
- Change "#" without quote to the link corresponding to the text you choose for the menu
Optional:
- You can drag the box inside the page element to choose where you want the menu to show up.
- You can change it's color by customizing the CSS by changing the value of color hex #XXXXX
Credit:
The credit for the codes goes to CSSHowto.com
How to find nofollow links
The attribution rel="nofollow" is a important factor to keep your site safe from Google's black list. Do follows are also extremely important for the free flow of page rank flow for building traffic for new blogger. I have already discussed this topic and usage no follow on another article "What is nofollow and how should you use it?" You can also read a very good article by Pradosh about the importance of do follow comments here. Well let's get to the point. I will show you a common way which you can use to find nofollow links from all the blogs and app for popular browsers that will simply highlight the nofollow links.
1. Go to the app page and install it
2. Look at the top right for the new icon and click on it
3. Look all the way down and check the box for "Show Nofollow"
4. You will see a pink border around nofollow links now
1. Go to this add on page (credit: @Pradosh)
2. Click on "add to Firefox"
3. Let it download and install it, you will have to restart your browser
4. Right click on the browser and choose "NofolowDofollow"
5. The links will be highlighted and a red highlight means nofollow
1. Go to the site and copy the link you want to check
2. Right click on the page and click on "view source" or similar option
3. CTRL+F and search for the specific term
4. look around the link for the term "nofollow" ; before </a>
5. If you can't find it it is not a nofollow link
Do you have a better way of finding nofollow links or have any questions? Tell us in the comment below.
Chrome App
1. Go to the app page and install it
2. Look at the top right for the new icon and click on it
3. Look all the way down and check the box for "Show Nofollow"
4. You will see a pink border around nofollow links now
Firefox Add on
1. Go to this add on page (credit: @Pradosh)
2. Click on "add to Firefox"
3. Let it download and install it, you will have to restart your browser
4. Right click on the browser and choose "NofolowDofollow"
5. The links will be highlighted and a red highlight means nofollow
Manual Action!
1. Go to the site and copy the link you want to check
2. Right click on the page and click on "view source" or similar option
3. CTRL+F and search for the specific term
4. look around the link for the term "nofollow" ; before </a>
5. If you can't find it it is not a nofollow link
Do you have a better way of finding nofollow links or have any questions? Tell us in the comment below.
Create Google Plus page
Google plus is the latest social media by Google. If you know the importance of social media in CEO you should know Google plus is times more significant. Since Google is the main search engine and Google uses the data from your Google plus account it c and share of you and your friends/clients. If you have a blog or small business you should definitely create a Google plus fan page similar to Facebook page. If you can get more + and share of your feed on Google Plus it is very easy to compete with High page rank sites and to focus on specific clients.
1. Go to the following link
2. Choose a category from the left
3. Fill out the information
4.Check Google agreement and Click create
Your done! Now you can switch between your profile and your pages profile as shown in the picture below.

You can visit our Google plus page and circle us to keep up with the latest tricks.
How to create Google plus page
1. Go to the following link
2. Choose a category from the left
3. Fill out the information
4.Check Google agreement and Click create
Your done! Now you can switch between your profile and your pages profile as shown in the picture below.

You can visit our Google plus page and circle us to keep up with the latest tricks.
Twitter Follower Box for blogger
Twitter doesn't have any current widget to show off your twitter fans like Facebook like box/ follower box. Well now you can with a customized twitter follower box. You can use this like a normal widget in your blog very much like the Facebook widget. You can follow simple steps to get your twitter follower box below.
Click For Live Demo

2. Click on design>Page element
3. Click add HTML/JavaScript where you want your widget to be
4. Under Content paste the following code
If your widget doesn't fit
Click on the widget to edit and CTRL+F to find "height" and change the value to lower and higher as you need. You can do the same with "Height" to fit your need.
Credit
The creator of this widget is Mark Carey. He created the original code for the the twitter follower box. You can go to the link and follow him to get the origin code.
Click For Live Demo

How to get twitter follower box for blogger
1. Go to blogger
2. Click on design>Page element
3. Click add HTML/JavaScript where you want your widget to be
4. Under Content paste the following code
And replace tripsontricks with your twitter username<!-- Twitter Follower Box -->
<script type='text/javascript'>
function fanbox_init(screen_name){document.getElementById('twitterfanbox').innerHTML='\<iframe name=\"fbfanIFrame_0\" frameborder=\"0\" allowtransparency=\"true\" src=\"http://s.moopz.com/connect.html?user='+screen_name+'\" class=\"FB_SERVER_IFRAME\" scrolling=\"no\" style=\"width: 295px; height: 250px; border-top-style: none; border-right-style: none; border-bottom-style: none; border-left-style: none; border-width: initial; border-color: initial; \"\>\<\/iframe\>';}
</script>
<div id="twitterfanbox"></div><script
type="text/javascript">fanbox_init("tripsontricks");</script
type="text>
<!-- End Twitter Follower Box -->
If your widget doesn't fit
Click on the widget to edit and CTRL+F to find "height" and change the value to lower and higher as you need. You can do the same with "Height" to fit your need.
Credit
The creator of this widget is Mark Carey. He created the original code for the the twitter follower box. You can go to the link and follow him to get the origin code.
Customize RSS Feeds Subscription Style
RSS is an acronym for Really Simple Syndication and Rich Site Summary, and it’s being used by millions of web users around the world to keep track of their favorite websites.
Almost webmasters want to have a lot of subscriber for they sites. Many tricks and tips to get it. Some people use a premium content as a prize for a people who follow or subscribe their sites. Some of them using pop up for subscription box, and many else. Now i want to try share blogger trick about how to customize RSS feeds subscription box style. Hope it can bring more subscriber to our sites.
Follow simple and easy step to adding this cool box in your blogger blog.
1. First go to your blogger Dashboard.
2. Now click in design tab and edit HTML.
3. Now click in small box to expand your blogger template.
4. Find this code ]]</b:skin> by CTRL+F key.
5. Now copy below code and paste before ]]</b:skin>
#subscribe {font-size:14px; color:#999;}
.subscribetext {background:url(https://blogger.googleusercontent.com/img/b/R29vZ2xl/AVvXsEhMzeCPHbnh4jIOlVWchIM7bdCkNX_fRuQtxevOpa0VhAu6Zi7brbw7vemGUf-DUHiDVWl0x4z9e07S6-Oi0EOxfkQyDCJF0hGBCatr5C2YzUNvXVHnywPeOryhyphenhyphenvUVTAhBjGIrFRWOPQP9/s400/bullet.png) left no-repeat; padding-left:20px; margin-bottom:20px;}
.subscriberss {line-height:35px; font-size:18px; border-bottom:1px dotted #CCC; padding-left:5px;}
.subtext { background:url(https://blogger.googleusercontent.com/img/b/R29vZ2xl/AVvXsEhhXtYed0pzvE7EgV3w8MFdP6XscXmS6PLSIndXIxK_3Gp_mFRBeA4Uo288aHFQ0az-neXryQN47OjuvGqmQS_V2kyup6KO5_2XraxIUjHgJXrMPvwxllNNYXnfy1WkMXCtME1SUPU6Q052/s400/feed.png) left center no-repeat; padding-left:37px; padding-bottom:5px;}
.twitter {line-height:35px; margin-bottom:15px; font-size:18px;border-bottom:1px dotted #CCC;}
.twittext { background:url(https://blogger.googleusercontent.com/img/b/R29vZ2xl/AVvXsEjqbaiOobICWoSWMCtNEGycWyT2fkcHE722hDQr1h7r2wJnpq5_Pdv2_GKZ1UsbXBtMSrBFKssfs8Oa1BHkdC93bpJMM3K_vpNWWX3unxSQNQqkySKJ93BdszmnlO3JmWCiKGGDfy9Ej2J3/s400/twitter.gif) left no-repeat; padding-left:42px;}
.subscribemail {margin-bottom:7px; font-size:11px; font-family:Arial, Helvetica, sans-serif;}
.subscribeinput{border:1px solid #CCC; width:180px; padding:3px;}
.subscribesubmit{ background:#FB9E3D; color:#fff; border:1px solid #FFF; font-family:Arial, Helvetica, sans-serif; padding:3px; width:70px; -moz-border-radius:5px;}
.facebook {line-height:35px;font-size:18px;border-bottom:1px dotted #CCC;margin:-10px 0 15px 0;}
.facetext { background:url(http://www.longislandcateringhalls.com/i/facebook-icon.png) left no-repeat; padding-left:42px;}
6. Now click to save your blogger template.
7. Again go to your blogger Dashboard.
8. Click in design tab and Page element.
9. Now click in add gadget which is in sidebar and when open new window click in HTML/javascript from list.
10. Copy the below code and paste it.
<div class='widget-content'>
<div id='subscribe'>
<div class='subscribetext'>Subscribe to our newsletter updates!</div>
<div class='subscriberss'><a class='subtext' href='YOUR FEEDBURNER URL HERE'>Subscribe via RSS feed</a></div>
<div class='twitter'><a class='twittext' href='YOUR TWITTER URL HERE'>Follow us on Twitter!</a></div>
<div class='facebook'><a class='facetext' href='YOUR FACEBOOK URL HERE'>Join Us On Facebook !</a></div>
<div class='subscribemail'>OR, subscribe via Email</div>
<form action='http://www.feedburner.com/fb/a/emailverify' id='subscribeform' method='get' onsubmit='window.open('http://www.feedburner.com', 'popupwindow', 'scrollbars=yes,width=550,height=520');return true' target='popupwindow'>
<input class="subscribeinput" id="sub" name="email" type="text" value="" /><input name="url" type="hidden" value="YOUR FEEDBURNER EMAIL URL HERE" /><input name="title" type="hidden" value="WordPress" /><input name="loc" type="hidden" value="en_US" /> <input class="subscribesubmit" type="submit" value="Sign up" />
</form>
</div>
</div>
Almost webmasters want to have a lot of subscriber for they sites. Many tricks and tips to get it. Some people use a premium content as a prize for a people who follow or subscribe their sites. Some of them using pop up for subscription box, and many else. Now i want to try share blogger trick about how to customize RSS feeds subscription box style. Hope it can bring more subscriber to our sites.
Follow simple and easy step to adding this cool box in your blogger blog.
1. First go to your blogger Dashboard.
2. Now click in design tab and edit HTML.
3. Now click in small box to expand your blogger template.
4. Find this code ]]</b:skin> by CTRL+F key.
5. Now copy below code and paste before ]]</b:skin>
#subscribe {font-size:14px; color:#999;}
.subscribetext {background:url(https://blogger.googleusercontent.com/img/b/R29vZ2xl/AVvXsEhMzeCPHbnh4jIOlVWchIM7bdCkNX_fRuQtxevOpa0VhAu6Zi7brbw7vemGUf-DUHiDVWl0x4z9e07S6-Oi0EOxfkQyDCJF0hGBCatr5C2YzUNvXVHnywPeOryhyphenhyphenvUVTAhBjGIrFRWOPQP9/s400/bullet.png) left no-repeat; padding-left:20px; margin-bottom:20px;}
.subscriberss {line-height:35px; font-size:18px; border-bottom:1px dotted #CCC; padding-left:5px;}
.subtext { background:url(https://blogger.googleusercontent.com/img/b/R29vZ2xl/AVvXsEhhXtYed0pzvE7EgV3w8MFdP6XscXmS6PLSIndXIxK_3Gp_mFRBeA4Uo288aHFQ0az-neXryQN47OjuvGqmQS_V2kyup6KO5_2XraxIUjHgJXrMPvwxllNNYXnfy1WkMXCtME1SUPU6Q052/s400/feed.png) left center no-repeat; padding-left:37px; padding-bottom:5px;}
.twitter {line-height:35px; margin-bottom:15px; font-size:18px;border-bottom:1px dotted #CCC;}
.twittext { background:url(https://blogger.googleusercontent.com/img/b/R29vZ2xl/AVvXsEjqbaiOobICWoSWMCtNEGycWyT2fkcHE722hDQr1h7r2wJnpq5_Pdv2_GKZ1UsbXBtMSrBFKssfs8Oa1BHkdC93bpJMM3K_vpNWWX3unxSQNQqkySKJ93BdszmnlO3JmWCiKGGDfy9Ej2J3/s400/twitter.gif) left no-repeat; padding-left:42px;}
.subscribemail {margin-bottom:7px; font-size:11px; font-family:Arial, Helvetica, sans-serif;}
.subscribeinput{border:1px solid #CCC; width:180px; padding:3px;}
.subscribesubmit{ background:#FB9E3D; color:#fff; border:1px solid #FFF; font-family:Arial, Helvetica, sans-serif; padding:3px; width:70px; -moz-border-radius:5px;}
.facebook {line-height:35px;font-size:18px;border-bottom:1px dotted #CCC;margin:-10px 0 15px 0;}
.facetext { background:url(http://www.longislandcateringhalls.com/i/facebook-icon.png) left no-repeat; padding-left:42px;}
6. Now click to save your blogger template.
7. Again go to your blogger Dashboard.
8. Click in design tab and Page element.
9. Now click in add gadget which is in sidebar and when open new window click in HTML/javascript from list.
10. Copy the below code and paste it.
<div class='widget-content'>
<div id='subscribe'>
<div class='subscribetext'>Subscribe to our newsletter updates!</div>
<div class='subscriberss'><a class='subtext' href='YOUR FEEDBURNER URL HERE'>Subscribe via RSS feed</a></div>
<div class='twitter'><a class='twittext' href='YOUR TWITTER URL HERE'>Follow us on Twitter!</a></div>
<div class='facebook'><a class='facetext' href='YOUR FACEBOOK URL HERE'>Join Us On Facebook !</a></div>
<div class='subscribemail'>OR, subscribe via Email</div>
<form action='http://www.feedburner.com/fb/a/emailverify' id='subscribeform' method='get' onsubmit='window.open('http://www.feedburner.com', 'popupwindow', 'scrollbars=yes,width=550,height=520');return true' target='popupwindow'>
<input class="subscribeinput" id="sub" name="email" type="text" value="" /><input name="url" type="hidden" value="YOUR FEEDBURNER EMAIL URL HERE" /><input name="title" type="hidden" value="WordPress" /><input name="loc" type="hidden" value="en_US" /> <input class="subscribesubmit" type="submit" value="Sign up" />
</form>
</div>
</div>
Automatic SEO for Images - Add Proper ALT and Title Tags Automatically
Earlier i told you best seo tips for images which were all manually to be followed. However, its not that easy to optimize each and every image for search engines. So, here is a JavaScript code for your blog which will add all necessary attributes such as ALT, Title etc to your images and optimize all your blog images for search engines. This is one of the easiest way to optimize all images in your blog posts and implementation process only takes less than a minute. This will not only optimize new images but will also optimize all images that your blog have in older posts.
1. Go to Dashboard > Design > Edit HTML (else move to next step)
2. Now, search for code in your template (tip: press CTRL + F and paste this code)
3. Paste below given code just Before </body>
<script src='http://ajax.googleapis.com/ajax/libs/jquery/1.3.2/jquery.min.js' type='text/javascript'/>
<script type='text/javascript'>
//<![CDATA[
$(document).ready(function() {
$('img').each(function(){
var $img = $(this);
var filename = $img.attr('src')
$img.attr('alt', filename.substring((filename.lastIndexOf('/'))+1, filename.lastIndexOf('.')));
});
});
//]]>
</script>
<script type='text/javascript'>
//<![CDATA[
$(document).ready(function() {
$('img').each(function(){
var $img = $(this);
var filename = $img.attr('src')
$img.attr('title', filename.substring((filename.lastIndexOf('/'))+1, filename.lastIndexOf('.')));
});
});
//]]>
</script>
4. Save Your Template
Source: Folsol
1. Go to Dashboard > Design > Edit HTML (else move to next step)
2. Now, search for code in your template (tip: press CTRL + F and paste this code)
3. Paste below given code just Before </body>
<script src='http://ajax.googleapis.com/ajax/libs/jquery/1.3.2/jquery.min.js' type='text/javascript'/>
<script type='text/javascript'>
//<![CDATA[
$(document).ready(function() {
$('img').each(function(){
var $img = $(this);
var filename = $img.attr('src')
$img.attr('alt', filename.substring((filename.lastIndexOf('/'))+1, filename.lastIndexOf('.')));
});
});
//]]>
</script>
<script type='text/javascript'>
//<![CDATA[
$(document).ready(function() {
$('img').each(function(){
var $img = $(this);
var filename = $img.attr('src')
$img.attr('title', filename.substring((filename.lastIndexOf('/'))+1, filename.lastIndexOf('.')));
});
});
//]]>
</script>
4. Save Your Template
Source: Folsol
Reasons why I would leave your blog
| Photo credit: anitapatterson from morguefile.com |
Unclear content
If you are writing about something you should know what your are writing on, don't act professional on something you don't know. The main element of a blog is it's content. You have to fix this before anything else. Make your content clear, right on point, easily understandable and fresh. And of course original. If your information is wrong or content is unclear it creates a huge negative impression on your reader which is almost impossible to delete with every cool design and offers you have for them. and make him/her click the back button.
Too much eye catching
If you have the right content you should start worry about your template and widget. Eye catching is important but it has to be professional. Some template are very poorly designed and completely unrelated to what readers are reading. Unless it's a personal blog your readers would be happy to hear the loud auto-play of your favorite song. Don't use too much gif/ flashy content, mouse effects or any other funky script that would make you visitors ask-"where's the bathroom?"
Advertising hammer
Well you heard somewhere online that you can also make money by blogging so you signed up for all the advertising sites. Since nobody seems to click on them you put a load of them, some pops up, some starts talking, some jumps on the screen and many other extra ways to earn some extra. If you think that's a right method think why your reader would come to your site, for your content. And if they can't get the information they wouldn't be interested on what is going on around and just click the close button. Limit your ads and if you have right content and template you will start get more clicks on your ad than hammering them on the head before.
Needy baby
"Pay 2 dollars to read the article on secrete to be cool"-sounds great deal right? Here's another one -"Register To view the article" or you can also use "Finish the surveys to see the article"to make your visitor run away. Don't expect too much from visitor, each one will not give you 10,000 dollar for you blog. Since there are billions of article on almost every topic online it's your job to keep your reader to you, they can find billions of the same article online, so if you find one don't ask for too many things right after they enter the door.
Randomness
Unless it's a personal blog, when people looks for a certain information they expect your blog to be on the same topic. Even if the reader finds one of your article helpful he wouldn't come back because he/she doesn't know if your future post will be on the same topic your client need information in or interested. It's important to keep your blog in one certain topic. If you get one visitor for one of the post you will get a returning visitor who will like your future posts. So don't make your blog random because it's only good for stalkers.
I would leave your site/blog for mainly because of these reason. I didn't mention some obvious reasons black hat techniques and spamming, cookies, malware etc. Try avoiding the things I have talked about to gain trust as a new blogger and get you readers to follow your blog. What are some of the reason you would leave a site/blog tell us in the comment below.
Money making tips for new blogger
For blogger who thinks blog = money, you are ...right! You can start earning money from your blog from your very first day. I will talk about one advertising program you can use right now to start earning from your blog. When you have a audience, the main focus for them is your content. And selling sidebar ads can be really hard job for new bloggers. So it is better to start with what your reader will actually care about. Yes, I am trying to to get the point on in-text ads.Today I will show you a affiliate in text program that I have been using from the beginning- Infolinks.
Simply Infolinks are in text ads. It behave link normal link from your website and when you mouse hoover it it shows the detail information of the link, if the viewer choose to check the link out and click on it you get paid. As you can see from the picture below

What is Infolink?
Simply Infolinks are in text ads. It behave link normal link from your website and when you mouse hoover it it shows the detail information of the link, if the viewer choose to check the link out and click on it you get paid. As you can see from the picture below

Why Infolinks?
- Infolinks doesn't require you to give personal information
- Infolinks doesn't have any minimum requirement- so anyone can join this programm
- Infolinks is highly customizable to match your templete
- Infolinks gives you the 70% of the revenue- the highest on the internet
- Infolinks needs only one minute of your time to set up the ad on your blog
- It also give yo options such as tag clouds, related tag, search wages other than in text ads for you to boost your earnings
- Infolinks payout methods are Paypal, ACH, Bank Wire
- Choose payout method whenever you want
- Infolinks pays you monthly
What is nofollow? How should you use nofollow?
Nofollow is the latest HTML attribution to stop the spammer to get free page-rank by Google. It stops the page rank flow from going to sites you choose. But that would be pretty odd thing to do when linking to someone by telling them they are not trustworthy. You should definitely start using no follow tag if you don't want to mark yourself as a spammer to Google. There are lot of confusion about how you should use nofollw tag to keep yourself safe; so in this article I will discuss what is nofollow tag, how to use it, what is it's purpose and concerns.What is nofollow
"Nofollow is a value that can be assigned to the rel attribute of an HTML a element to instruct some search engines that a hyperlink should not influence the link target's ranking in the search engine's index. It is intended to reduce the effectiveness of certain types of search engine spam, thereby improving the quality of search engine results and preventing spamdexing from occurring."
~Wikipedia
Since links are ranks. This extra attribution rel="nofollow" tells google not to follow them, where the dofollow flows the rank to the following site.
How to use nofollow
Example of a normal link
<a href=”Your URL”>URL TEXT</a>
Example of a nofollow link
<a href=”Your URL” rel=”nofollow”>URL TEXT</a>
It doesn't make any difference to link to a site but it is different to Google on how he consider the link.
Where to use nofollow link/purpose of nofollow
If you are linking to hundreds or thousands of outward link you should start using nofollow tag, if you link to low rank page in normal linking you loose 'some' pagerank. It's time to figure out what site deserves the rank. But if you are following everyone giving away free ranks, Google will spot you as a spammer. Sites that are not trustworthy, paid links and anywhere you don't want your site to link in search engine publicly.The main purpose of this attribution is to stop spammers although there are many opinions on if it actually can serve it's purpose.
Where not use nofollow?
No follow is to stop spammer, you are not one of them. When linking to your own site (internal link) you definitely should not nofollow them. This doesn't mean you can link all 50 site you own. Only internal links from your site are safe to use without nofollow. There are only few exceptions but mostly you are free to dofollow (normal links) all the internal link.
So should I nofolllow all my links?
Sites such as Wikipedia completely nofollowed their content due to the increased number of spammers. Many webmaster goes completely goes against the idea of nofollow and others with it. Google's head of webspam team Matt Cutts discussed the question on YouTube.
Also the answer wasn't clear, my understanding are following- you should use both normal and nofollow link. Nofollow all seems noprolem but it definately isn't a good image for your website. Also nofollow all the links concerns search engine about where you 'link' to.
Find more information
Source: Wikipedia, Webmaster Tool Help
Blogger's New Threaded Comments Features and How To Enable It?
Recently blogger introduces threaded comments features. Which is a great step forward. All bloggers re bored with old commenting systems. But now you don't need to be worry about reply options etc. First take a look at some features of threaded comments than I will show you how to enable threaded comments option in bloggers
Some Features of Bloggers Threaded comments
- Your readers can now easily interact with more freedom and flexibility while leaving replies or posting comments.
- You don't need to use @etc to reply to comment
How To Enable Bloggers Threaded comments
You just need to enable two options:
Set FEED to Full
- Go To Blogger > Settings > Site Feeds
- Set Allow Blog Feed To Full
- Hit save
Embedded Comments
You must embedded comments below posts as you can see in our blog. The comments are visible just below posts and you don't need to click a link for comments to popup. I am sure most of you are using embedded comments but for those who aren't please do this:
- Go To Blogger > Settings > comments
- Choose "Embedded below posts"
- Hit Save!
All done! You must see now a reply link below each comment posted. Clicking this link will allow you to reply to a specific comment. Enjoy this excellent new feature.
Ammar is the a 16 Years old blogger. He loves to write about Tips, Tricks and Tutorials. He blogs at AllBloggingTips where he share Blogging Tips and Free Themes
How to customize pictures
We all know the importance of good images in a blog. One good image can turn a article from ok to the best. Sometimes even your best image wants some simple customization to fit your blog. Photo effect such as round corners, reflection, shadow are popular and fastest way to make your photo ready for your blog. Sometimes it is better to remove image border from your blog and choose the photo with right background to give your image more professional look. In this post I will show several websites that allows you to add the effects keeping the quality of your photo intact.Customizing your pictures
![]() |
| Photo Credit: 3rdworldman from morguefile.com |
►Crop it with Resizeyourimage.com
Sometimes before you re-size your image might you want to crop it first. Sometimes details can highlight your article better. And this site does a really great job with it. You can Visually choose and crop out the image and still have your original quality.
► Resize it with Resizr.com
Resizing your image is important to focus on the detail or to fit your thumbnail perfectly. It is better to crop your photo your image before you start adding any effect. From this website you can very easily customize and and choose dimensions and quality of your photo as well as formats.
►Add Shadow effect with Dropshadow.net
After your done with with cropping and resizing you can start adding some cool effect such as shadow for a realistic look. From this site you can do exactly that without having to loose any quality. If your blog doesn't have any borders shadow and reflection effect are a a killer way to make your photo 'awesome' for your blog.
►Add Reflection effect with GenFerateit.net
Adding reflection effect makes your image stand out just like adding shadow. And this website is already popular for several other generator and does a great job on creating customized reflection. You also don't have to loose any image quality. But remember not to to add reflection and shadow on the same image.
Those followings are mainly the most popular and effective effects to make your photo better in minutes. The best thing about those tools are that they are completely free and keep your photo quality intact. Whether you need a photo for a website or to customize your personal photo
fast and free this tool always comes handy.
Share and comment below if you like it and your favorite customizing tool.
What is blogging?
Your blog or web log is your won online space to share your thoughts ideas and information. But if you want to take those ideas and information in a new level so that it finds a fair amount of reader, you should consider following some 'rule' to make your blog stand out. The more professional your blog will look the more chances of you getting more ‘loyal’ readers. I will write a series of short articles on each topics to start your journey on blogging.
Although the first thing that comes in mind for start blogging is to find a good blogging platform, this article will mainly focus on the base idea of blogging. But just to point fingers the best blogging platform right now you can use for free are either Blogger or Wordpress. But the ideas for all platforms are ‘blogging’ that's what actually matters.
Some great articles on pros and cons of blogger platform
Blog is short for web log. It’s you won little space online. You can connect to other people by spreading your thoughts, ideas, experiences, information rumors and pretty much anything you like. It’s your choice what you want to put into your blog and that chooses who you want as your audience. Check out the video for better understanding on 'blogging'. The more you know about your base the better it is for you success later on.
Blogging is one thing that if you want to success in, you should never stop writing. The more you blog, you learn about your skills, improvements and also notify bots about the importance of your blog. It is always your choice why you want to blog and how you want to blog. But if you see no point of writing and sharing, blogging just might not be for you. And you must have courage to write regularly. And if you have heard about dream stories to earn thousands of dollar just by writing anything out there-you now know what are scam what are not. Choose first if you actually want to blog or not because it’s a rather difficult (easy) process to create a successful blog. Otherwise it’s just waste of your valuable time.
Now if you choose to blog, you need a focused an basic idea on what you are going to write about. It can be anything you want but you have to have good passion or experience on it. It can be about gardening, rockets, new technology or anything you are interested in. Even if you like quantum physics and know nothing about it is possible to write and create a successful blog on it but chances are very low. It is important to focus your blog on only one topic. It can be a broad topic but it should flow in one direction in order to keep your reader focused. Writing about random things are not a good way to get a single targeted audience. And your audience wants certain type of news/solution and it is less likely someone will follow your blog for that one post. Thinking about what you-as a audience would like, is the main idea for creating a good content and/or blog.It is very important to write about one topic unless you have a broad audience ready for you.
Follow our blog for next series. Also be sure to leave a comment on what you think about the topics for today.